Sunday, September 18, 2022

The Man, the Myth, the Legend...The 'Duke

I mostly stick to metal figures, but I've ventured out a little bit to explore some resin figures. The latest being this limited-edition figure of classic D&D villain Warduke from Forge of Ice. The detail is immaculate, and the three pieces fit together perfectly. I built up a 30mm round base with two layers of cork to elevate Warduke above his opponents, and that's another new thing for me. It worked out well, but between the fragility of the resin and how lightly he's affixed to the cork, I think he's just going to be a display piece instead of a gaming piece.


The blue armor is two coats of GW "Soulstone Blue" technical paint over a base of silver, which gave me a candy apple kind of shiny, metallic finish that I think worked out really well. Everything else is kind of my standard techniques - skin is Reaper Tanned Shadow, washed with GW Reikland Fleshshade, highlighted with Reaper Tanned Skin, the blue-black leather of his boots and dagger scabbard are Reaper Coal Black highlighted with Reaper Midnight Blue. The grass is two colors and coarsenesses of Woodland Scenics flock mixed together. 

Overall, I pushed my comfort zone with this figure and I'm happy with how he turned out, but I still very much prefer metal figures.

Monday, September 5, 2022

Tales of Horror: The Beast in the Hills

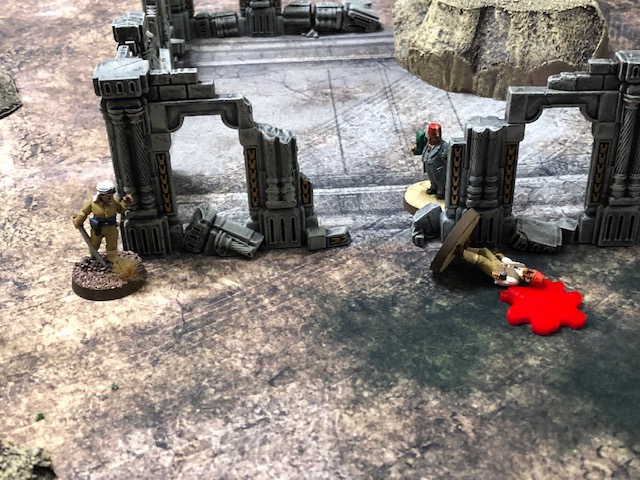
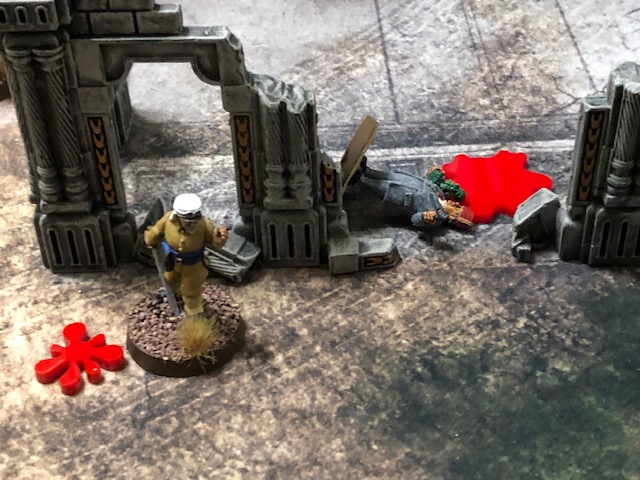
 I wrapped up my holiday weekend with a second solo game of Fistful of Lead, this time using their "Tales of Horror" supplement. I pulled "Major LeDuc's Enfants Terrible," a ragtag band of French Foreign Legionnaires from Pulp Figures for my Hunter group; I envisioned them as a secretive group within the Legion, called upon to handle problems too outre for regular Legionnaires. For my Cultists, I pulled some Moroccan Explorers and Assistants from Brigade Games' first Cthulhu kickstarter; I painted these about a year ago, but yesterday I went back, touched them up, redid their bases. I designated them the Sons of the Black Pharaoh, and was ready to go.

Bloodied but unbowed, Major LeDuc approaches the altar where Ardath Bey completes his ritual
 

Scenario was "The Beast in the Woods," out of the Tales of Horror book; I subbed in hills and ruins for woods. I also managed to forget that the scenario is supposed to have a trio of ghosts moving randomly around the board; I think it's probably for the best, because the scenario worked out just fine as is. The Cultists had to perform the biggest summoning ritual they could within 8 turns (at which point, the Stars would no longer be Right), and the Hunters had to disrupt it.


Major LeDuc's Enfants Terrible (Hunters)
Group Trait: Loyal

  • Major LeDuc (Leader; Veteran, Encouraging, Swordsman, Tough as Nails), armed with a Pistol, Saber and Holy Water
  • Ibrahim (Specialist; Ranged Fighter, Sniper) armed with a Rifle and Blessed Bullets
  • Peter, the Russian Bear (Regular; Brawler) armed with an Axe and Rifle
  • Barker (Regular; Ranger), armed with a SMG
  • Beni (Regular; Slippery) armed with Dynamite Bundles


The Sons of the Black Pharaoh (Cultists)
Group Trait: Ranger

  • Ardath Bey (Leader; Veteran, Devout, Stealthy, Sixth Sense), armed with a Dagger and Ritual Tome
  • Professor Andoheb (Specialist; Occult Expert, Deadeye), armed with a Pistol and Unholy Relic
  • Hossam (Regular; Steady), armed with a Rifle
  • Yousef (Regular; Coolheaded), armed with a Pistol
  • Al-Hazrat (Regular; Brawler), armed with a Big Knife


The first turn saw Ardath Bey begin his summoning ritual while the Hunters and Cultists both fanned out, sticking to the cover provided by the ruins and hills, with a few inconsequential shots fired; between distance and cover penalties, none of them were successful. Turn 2 saw the summoning fail due to poor rolling, necessitating Ardath starting fresh on Turn 3. Meanwhile, LeDuc put Yousef out of action, and being shot at in turn by Professor Andoheb (no result) and Hossam (Wounding LeDuc).


Peter shot at Hossam, then moved towards the ruins on the right, where he was met and attacked by Al-Hazrat. The Russian bear was no match for Al-Hazrat's knifework; he was wounded, then wounded a second time while prone. Peter managed to struggle to his feet and swing his axe one more time, but Al-Hazrat's dagger found its way between his ribs a third and final time.


Beni threw a few dynamite bundles towards Al-Hazrat, leaving him shaken, but the cultist rallied and turned his attention to knifing Ibrahim, the sniper, killing him and then charging Beni. Beni slipped away and threw a final bundle of dynamite, which landed just short of Al-Hazrat. The two men stared at the dynamite as the fuse burned down; BANG! Al-Hazrat was put out of action by the blast!

LeDuc rallied to his feet and shot Professor Andoheb, who bled out immediately upon trying to stand back up. Moving forward across the battlefield as quickly as his injury would let him, he tried to shoot Hossam to eliminate the threat of rifle-fire; CLICK! A "1" on the die meant LeDuc went Out of Ammo!


Meanwhile, Ardath Bey spent turns 3,4 and 5 Summoning, and with what remained of the Hunters closing in, opted to call forth a demon there, instead of trying for one more round. A Veteran-level demon (with the traits Veteran, Large and Fangs and Claws) emerged onto the battlefield.

On turn 6, Ardath Bey turned his attention to the remaining Hunters; he cast "Dark Portal," flinging Major LeDuc across the battlefield into a wall, putting another wound (and a Shock token) on him. Barker opened fire with his SMG on the demon and Ardath Bey, putting a Shock token on the Demon and going Out of Ammo for using Burst fire. The Demon charged Barker, but failed to wound him.


On turn 7, LeDuc tried to stand but only managed to crawl a little bit; meanwhile Barker managed to beat the demon Out of Action using his empty SMG. Ardath Bey tried to cast "Dark Portal" on Beni but the spell failed, and instead, Beni got shot by Hossam. 


On turn 8, Ardath Bey cast "Dark Portal" successfully on Barker, hurling him into a rock outcropping and killing him instantly. Beni bled out from his wound, and LeDuc just couldn't get back on his feet. Seeing that the stars were no longer in alignment and satisfied with what he'd accomplished, Ardath Bey (and Hossam) slunk away into the darkness.

Saturday, September 3, 2022

Back of Beyond: Red Guards and Little Green Men

 I played a very quick solo game of Fistful of Lead last night, to celebrate getting a squad of Bolsheviks painted and varnished. Their opponents were some Saucermen from Recreational Conflict, who have some wonderful 1950s sci-fi figures, along with a line of Flash Gordon-style serial types. 

Eastern Siberia, 1921. Colonel Rokoff and a Cheka squad under his command were dispatched to the tiny, remote village of Ludovosk, following reports of a fireball seen falling from the sky in its vicinity. Fearing some new weapon in the hands of the White Army or that the British had made a move against the Revolution, the Comintern wanted details on what was going on in Ludovosk. 

As soon as they reached the edge of the ruined village of Ludovosk, Rokoff's men were attacked by a huge, burrowing insect-like creature. The sounds of battle brought a group of small, green-skinned humanoids with oversized heads and singular red eyes out from the ruins to the northeast. The fireball had been a crashing spaceship!


Things went very quickly and brutally from that point. The Burrowing Behemoth rolled abysmally, even using D12s, and was killed by the middle of Turn 3 by the Bolsheviks. I don't think I rolled above a 5 once for the creature, meaning it failed every Close Combat roll it made and every Armor roll to see if it soaked any damage. 

Meanwhile the dice were extremely hot for the Martians; they were armed with Blaster Rifles (except for the Leader), and even with the -1 to hit for being Inaccurate, they gunned down the Russians in very short order, with the +1 to Wound that Blasters have resulting in a lot of instant "Out of Action" results. 

The last of the Russians went down in the middle of Turn 5, having killed two Martians at range but failed to accomplish their primary mission of capturing one alive for interrogation. The Martians primary mission was making sure all the humans and the Burrowing Behemoth were dead, so they succeeded admirably.

Tuesday, August 23, 2022

BATTLE SUIT ALPHA Pre-Order Sale at Wiley Games!

 So, as you probably know if you've been reading here for a bit, Wiley Games' Fistful of Lead ruleset is my go-to skirmish game and has been since around 2019ish. I use it for everything - Pulp, GI Joes, Post-Apocalyptic, Sci-Fi, Horror...at some point I should paint up some cowboys and use it for its original purpose as well!


Well, the newest iteration of Fistful of Lead is BATTLE SUIT ALPHA, modifying the core rules to accommodate big stompy mech-suits duking it out. Now, I'm not a Battletech guy; I muddled my way through a demo game of CAV maybe 15-16 years ago at my alma mater's annual gaming convention. I never watched Robotech or any of the various Gundam animes. Outside of watching the movies Pacific Rim and Robot Jox, big stompy mech-suits have never been hugely on my radar. 


Seeing videos of some of Jaye Wiley's playtest games of Battlesuit Alpha, however, swung me.

The rules are currently up for pre-order at 10% off, and will remain so until mid-October, so now's the perfect time to place an order.

 Of course I've ordered my copy. And started examining Reaper Miniatures' current line of plastic CAV models...

Saturday, August 13, 2022

Back of Beyond: "By God, That's an Angry Yeti!"

 "I say, Mac, did you see this piece in the Gazette?" Blinky Alsop looked up from his paper. "One of those Abominable Snowman-types is being blamed for raiding a traveler's inn outside Kashgar and stealing kegs of the local lager. Might be jolly good sport to go bag one of these slobbering, hair-covered, knuckle-dragging brutes and bring it back to the Museum, eh?"

MacCurdy, Alsop's batsman, paused before responding. "No need to go all the way to Kashgar, sir," he said. "I've got a brother-in-law in Aberdeen who fits that description well enough."

"Always quick with a joke, aren't you Mac? I thought you Scotsmen were all dour types. Regardless, I could use a month or two of fun. I'll call Barton and see if he's bored with hunting tigers yet, have the staff make our travel arrangements."

***

"I'm sorry, sir, what was the assignment?" Captain Jonathan Hyde-Whyte blanched. He hoped he'd misheard.

"I don't care for it any more than you do, Captain." The Major frowned into his tea. "The fact of the matter is that Winfield 'Blinky' Alsop is here to hunt Abominable Snowmen, and his uncle's got pull in Parliament. I'm assigning you and some of the lads as Alsop's escort through the region. Try to make sure that young fool checks his boots before putting them on, won't you?"

The Major sipped his tea.

"Our boys in the field have reported that Richard Schweinhunde, a German air-ace who's been selling his services all over the East, was shot down over the region Alsop wants to check for Snowmen. See if you can't root out that Jerry weasel while you're there, eh?"

***

The Benevolent and Honorable General Chun Zhao looked up from the report he'd been given. "A British hunting expedition in search of the wild ape-man? They really do think we are fools, don't they?"

"This is clearly a farcical attempt to disguise a planned espionage mission," the General continued, "but in my wisdom I have seen through the British lies." The man seated opposite him said nothing. He hadn't been encouraged to speak.

"You will take your band of hired killers, Zhancang, and ensure that the Gobi swallows yet another unprepared group of Westerners." Still silent, Zhancang nodded understanding and rose from his chair.

***

I had another very enjoyable solo game of Fistful of Lead today, this time breaking out some Copplestone Casting and Pulp Figures for a Pulp adventure in Central Asia, somewhere between 1921 and 1936. I played around a bit with assymetrical deployment and hidden objectives, which was fun, though may need more fine-tuning. 

I designated five searchable areas, four of which might contain a lurking Yeti, and one hiding the German spy. Searching each area could be done once, utilizing one or two actions; a Task roll of 8+ revealed whatever was hiding in the area, with a bonus to the roll for using both actions. A roll of "1" meant something bad happened, and once an area was searched, pass or fail, it couldn't be searched again by another figure. It was entirely within the realm of possibility that nobody would find anything!

The Brits got one free turn to spread out and begin Yeti-hunting before Zhancang's mercenaries arrived on the table. 

Our crews were as follows:

The British Yeti-Hunters (Group Trait: Coolheaded)


  • Winfield "Blinky" Alsop (Leader; Dodge, Sixth Sense, Eagle-Eyed), armed with a Pistol
  • Barton (Specialist; Sniper, Deft), armed with a Rifle
  • MacCurdy (Regular; Steady, Ranger, Drunkard), armed with a Shotgun
  • Captain Hyde-Whyte (Regular; Deadeye), armed with a Pistol
  • Tommies (Grunt Group; Loyal), armed with Rifles

The Renegades of Kashgar (Group Trait: Killers


  • Zhancang (Leader; Veteran, Encouraging, Lucky), armed with a Bren LMG
  • Piers Buckley (Specialist; Brawler, Determined), armed with a Pistol and Saber
  • Major Baumgartner (Regular; Deadeye), armed with a Pistol
  • Dr. Herge (Regular; Medic), armed with a Rifle
  • Mrs. Mainwaring (Regular; Steady), armed with a Pistol


Things got off to a spectacular start as MacCurdy approached the first search point and rolled a "1" on his search; Something Bad had been triggered, and the sands shifted beneath the Scotsman's feet as a Mongolian Death Worm reared up! 


"I've eaten haggises bigger than you," MacCurdy growled as his fist connected with what passed for the Death Worm's chin. Blinky went to fire at the creature with his pistol and - rolled a "1"! Out of Ammo! Barton fired on the writhing horror, and then at the beginning of Turn 2, MacCurdy finished the creature off with a double-barreled blast from his shotgun. 

Meanwhile, Captain Hyde-Whyte searched the inn at the center of the table, coming up empty-handed. Major Baumgartner arrived on the table and searched the Woods, flushing a Yeti out of hiding, and the Tommies flushed out a second one hiding near the Roadside Shrine. 

Zhancang's mercenaries began to spread out across the board, with Piers Buckley making a bee-line for the Ruins that were the final searchable location, with Zhancang .himself and Mrs. Mainwaring following behind. Unaware of the Yetis on the far side of the inn, Alsop moved up towards the Ruins as well, with MacCurdy following.

Zhancang paused to address the Yetis in his immediate vicinity, getting charged by one and clubbing it with the stock of his Bren. Two of the Tommies took Shock markers as the other Yeti threw rocks at them. Barton and Hyde-Whyte joined in the shooting, as did Baumgartner and Herge, alternating between shooting at Yetis and each other. Hyde-Whyte rolled a "1" and went Out of Ammo pretty quickly trying to shoot at Zhancang. Despite each being wounded, both Yetis kept getting back on their feet, at least for another turn or two; the one that had attacked Zhancang charged Baumgartner and got pistol-whipped for its trouble. With the Yeti down, Baumgartner got shot at by the Tommies, wounding him.


Baumgartner got to his feet and shot one of the Tommies, and was immediately shot in turn by Hyde-Whyte, going down with another wound; the Yeti staggered to its feet and went running.

Meanwhile, Alsop spotted Buckley and shot him, killing the mercenary instantly; Zhancang, stunned by his encounter with the Yeti, attempted to shake off his shock, but seeing Buckley's body hit the dirt, Zhancang shook his head and decided discretion was the better part of valor (he rolled a "1" on his Shock Recovery test, I used his Lucky reroll, and got another "1."), and fled the scene.


Barton fired at the fleeing Yeti, killing it; Herge shot at the other Yeti, resulting in it having more Shock tokens on it than remaining wounds, causing it to route off the table. Alsop searched the Ruins, but came up empty-handed. Furious at Buckley's death and Zhancang's desertion, Mrs. Mainwaring fired a few shots at Alsop, missing on all of them; in response, MacCurdy charged into range and gave her both barrels of his shotgun, sending her Out of Action. 


Dr. Herge performed first aid on Major Baumgartner, getting the Major back on his feet; another bullet from Barton sent the Major Out of Action, and Dr. Herge surrendered. Barton and Alsop collected their Yeti carcass, pausing to be photographed posing with it; their return trip to the British Embassy would be spent entirely in arguing over whether the Yeti would be turned over to the zoologists of the British Museum, or stuffed and mounted in Barton's smoking lounge.

Once everyone had left, Captain Richard Schweinhund, formerly of the Imperial German Air Service, popped out of his hiding place. "What was all that?" he wondered, gagging down another mouthful of fermented yak's milk (he'd trade military secrets for a decent doppelbock, he thought to himself) before disappearing back into hiding.


Sunday, July 31, 2022

Life Update

 July's been a challenging month for me, painting-wise. Just been too hot, and our air-conditioner doesn't reach my painting desk. And I would have liked to have had a game to report today, but my printer was out of ink and I really didn't want to copy down gang rosters by hand and then try to decipher my own handwriting. 

I have gotten a few figures started for a Fistful of Lead Fantasy game I've got in mind, and I may play through another game or two of Fantasy in August as well. 

 This is "Kanag the Slayer," a Reaper Bones figure from the Bones 4 Kickstarter. He came with a pretty snazzy integral base, rough dungeon stone with some shackles bolted to them, but I had to carefully cut him off of it so that I could paint his cape more easily. Colors right now are Turbodork "Absinthe" for the armor and "Let Them Eat Cake," a colorshift paint, for the face on the shield. His cloak is base-coated in Reaper "Violet Red" and highlighted with "Pale Violet Red." Various metallic accents will be gold, steel and silver, and once I paint that dungeon stone base he'll be glued back on to it. 

And as to more exciting matters...after almost 12 years with my partner, and referring to ourselves as "married in all but paperwork" for the last several years, we went down to the town courthouse this past week and filled out our paperwork. 


Sunday, June 19, 2022

GI Joe: Attack of the Sleezoids

 So I've painted enough of my GI Joe and Cobra figures to put on a solo game of Fistful of Lead, and last night I did exactly that. 

Episode setup: Dismissed from Harvard for his unethical experiments, disgraced geneticist Dr. Hiram Sleeze is currently hiding out in a junkyard shantytown in the American Southwest. At Dr. Mindbender's suggestion, Cobra seeks to recruit Dr. Sleeze to their cause, and won't take no for an answer. A Joe team is dispatched to deny Cobra the opportunity to recruit Sleeze as an asset. Sleeze, for his part, is wracked by paranoid delusions; he's not going with anybody, no matter who they are! He's armed himself with a poison syringe and a couple of sticky "goo grenades," and has released a number of genetic monstrosities, called "Sleezoids," into the surrounding environment. 

GI Joe and Cobra deploy at opposite corners of the board. Searching for Dr. Sleeze involves entering a building and spending an action to Search; on a 10+, he's found. Searchers add +1 to the roll for each building that's already been searched. If he's not found sooner, Sleeze is in the final building left to be searched, regardless of the results of the search roll. Once found, Sleeze had to be beaten in Close Combat to grab him. Once grabbed, he needs to be escorted to that team's starting table edge to secure victory.


Whenever a Joker is played for a figure's activation, a Sleezoid spawns, emerging from a terrain feature and attacking a member of the opposing squad. So if one of the Joes activates on a Joker card, a Sleezoid appears and attacks one of Cobra's operatives. 


GI JOE (Team Trait: Tactical)

  • Duke (Leader; Veteran, Nerves of Steel, Tough as Nails, Encouraging) armed with an SMG and 2 Frag Grenades
  • Scarlett (Specialist; Smart, Cunning, Sniper) armed with a Crossbow
  • Snake-Eyes (Specialist; Brawler, Flurry of Blows) armed with an SMG and Katana
  • Shipwreck (Regular; Deadeye, Sharp Tongued) armed with a Pistol
  • Lifeline (Regular; Medic) armed with a Pistol and carrying a Medi-Pack


COBRA (Team Trait: Ferocious)

  • Major Sebastian Bludd (Leader; Veteran, Deadeye, Inspiring, Bodyguard) armed with a Pistol and wearing Light Armor
  • Zartan (Specialist; Camouflage, Stealthy, Dodge) armed with a Crossbow
  • Torch (Regular; Killer) armed with a Flamethrower
  • Buzzer (Regular; Thundering Charge) armed with a Chainsaw
  • Ripper (Regular; Brawler) armed with an Automatic Rifle and Weaponized Jaws of Life
  • Cobra Troopers (Grunt Group; Tough as Nails) armed with Automatic Rifles

 The game started with the Joes and Cobra fanning out; at the start of turn 2, Ripper investigated one building, coming out empty-handed; Duke checked another, and found Dr. Sleeze - and got stabbed with a poison syringe for his trouble!  Sleeze took of running as a pair (!) of Sleezoids popped out, attacking Zartan and Scarlett. Duke went down, wounded and delirious as the poison ravaged his system; Scarlett was wounded, but the Sleezoid forced back temporarily by Shipwreck, while Bludd shot the creature attacking Zartan. 


Snake-Eyes took off in pursuit of Dr. Sleeze, but got tackled by a THIRD Sleezoid. With one swing of its powerful paw, the Sleezoid put the ninja warrior Out of Action.


With three Sleezoids rampaging around the board, both the Joes and Cobra focused their attention more on dealing with the genetic abominations instead of shooting at each other (mostly). Lifeline got Duke back on his feet, and then moved and did the same for Scarlett. Ripper and Buzzer moved to intercept Dr. Sleeze; Buzzer got hit with a Goo Grenade, sticking him in place, and then got attacked and mauled by a Sleezoid before he could get free. 

Ripper managed to grab Dr. Sleeze and started hauling him towards the table edge, but got shot in the back by Duke and put Out of Action. Dr. Sleeze took off running. Torch (aided by a pair of Cobra Troopers) and Shipwreck each put a Sleezoid out of action, and the third got caught up a fight against a nameless Cobra Trooper that somehow managed to win three rounds of Close Combat, putting a Shock token and pushing the creature away each time before the creature finally routed off the table. 

With the Sleezoids dealt with, Zartan, Torch and the remaining Cobra troopers turned their attention towards the Joes; Major Bludd caught up to Dr. Sleeze and grabbed him by the collar (an Out of Action result from his Close Combat roll!). 


"Right, Dr. Sleeze, you're coming with me! COBRAAAAAA!"

Duke, Scarlett, Shipwreck and Lifeline worked their way across the middle of the table, taking down Cobra Troopers and sending Zartan darting from cover to cover. Zartan wasn't able to sit still long enough to reload his crossbow, and his active participation in the game was curtailed by Shipwreck's right hook.


It looked like it would be a Cobra victory, as Bludd managed to drag the unconscious Dr. Sleeze within 4" of the Cobra table edge. But just then...Duke activated on a Joker. A new Sleezoid emerged, tackling Major Bludd! The creature kept the Australian mercenary tied up long enough for the Joes to converge on his position, and 4" from the table edge, the Sleezoid put Bludd out of action before getting killed itself with a crossbow bolt from Scarlett. At the 11th hour, the Joes eked out a victory! YO JOE!

This was a fantastic game that kept me guessing. Having three Sleezoids emerge within the span of two turns took me by surprise for sure. At one point every "Out of Ammo" marker I had was on the table (the black "raygun" piece in some of the pictures). Multiple figures were wounded, went down, struggled to their feet...Zartan and Shipwreck both healed by activating on the Queen of Hearts card at different points during the game. 

Both Snake-Eyes and Duke were ultimately put out of action, but Scarlett, Shipwreck and Lifeline were in perfect health at the end of the game. When the game ended, everyone from Cobra was out of action except for Zartan, who was prone with two Wounds on him. Just a brutal game; Cobra had more long-range firepower with the five automatic rifles they were able to bring to bear, but Lifeline's presence helped balance that somewhat by keeping Joes on their feet and in the game. In retrospect now I realize I forgot to roll for Bludd's armor to see if it lessened the hit from the Sleezoid at the end, but with so much going on this solo game ended up taking about two hours to play through and by the end of it my brain was getting foggy.